SpinzFlix Kodi Repository
SpinzFlix Kodi is a new addon that is available through SpinzTV repository. The fact that it is a new addon, it might will get unnoticed by the law enforcement authorities and may have less chances of shutdown.
It is a great addon for streaming your favorite movies and TV shows in High Quality (HD). It has a great number of categories and trust us when we say that this addon is a keeper. Follow our guide to learn how to install SpinzFlix Kodi addon or check this kodi addons guide for more alternatives.
How to install SpinzFlix Kodi on Krypton Version 17.6 or Lower
- Launch Kodi Application.
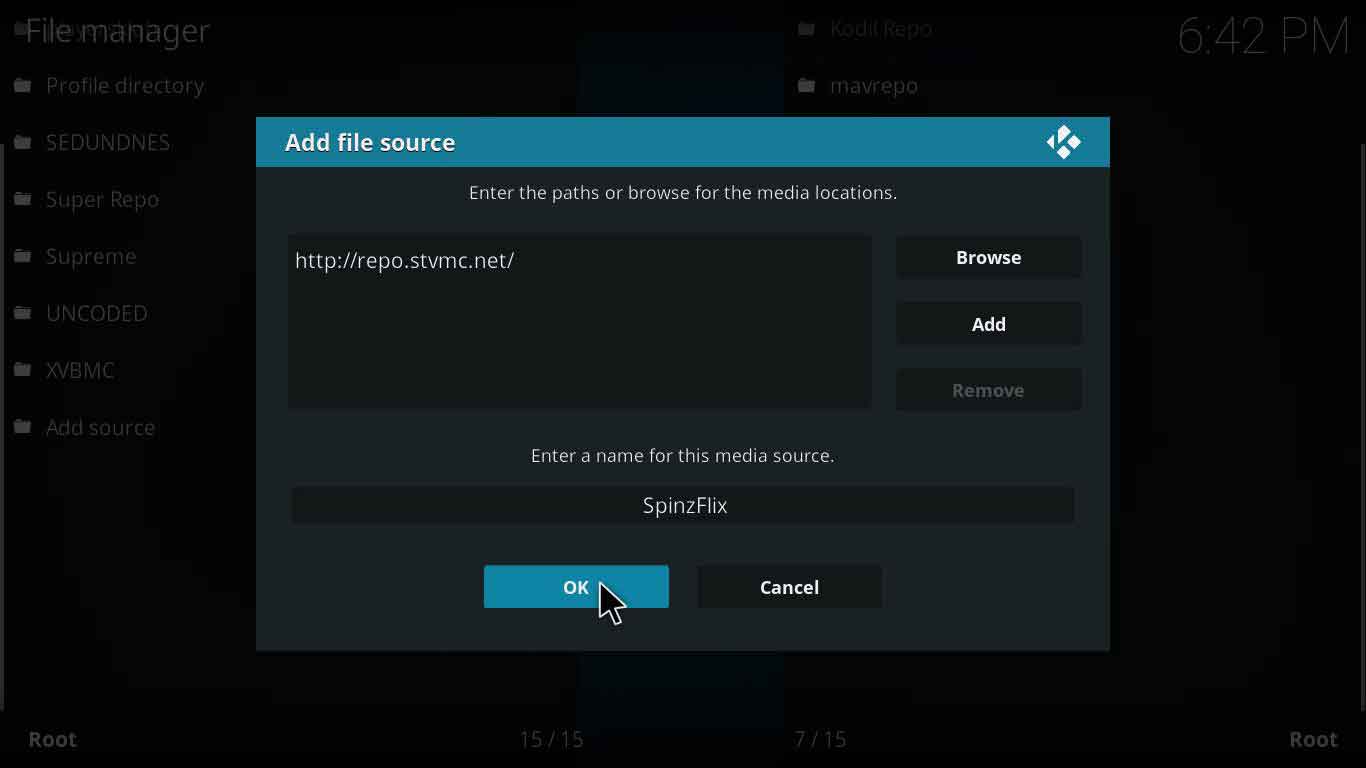
- You’ll see a Gear Icon (Settings Icon) on the top of left column, Click on it > Then select File Manager > Here you’ll see an Add Source option, double click on it.
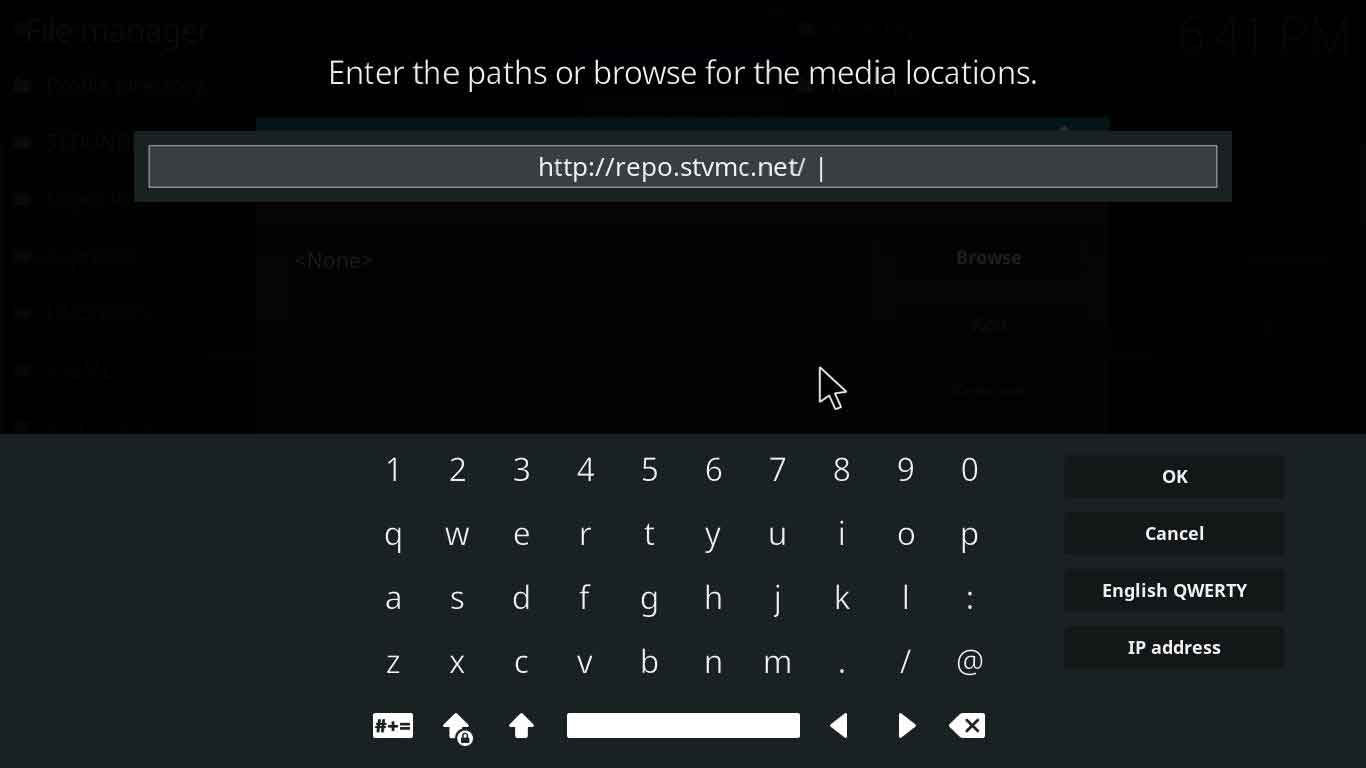
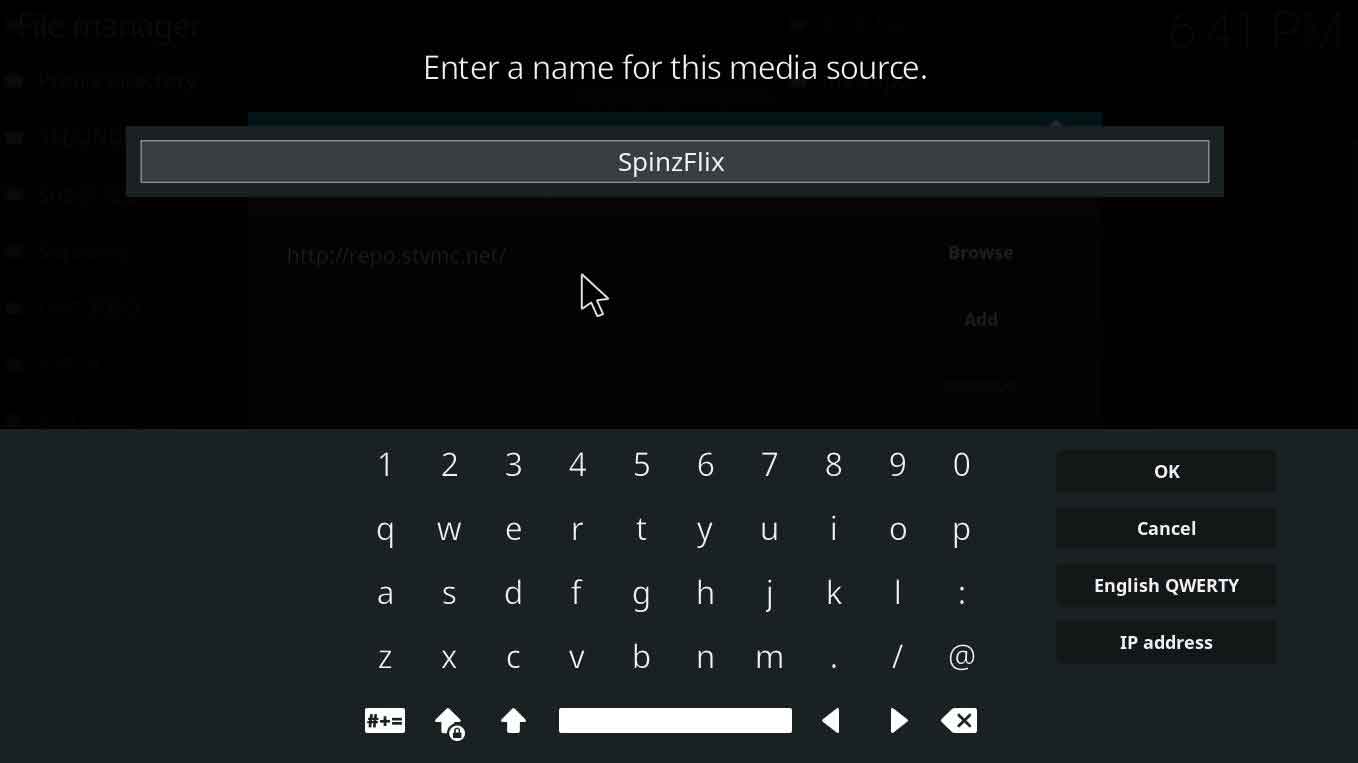
- Click where it says <None> and type this URL exactly http://repo.stvmc.net/ and click Ok > Now name this source ‘SpinzFlix’ and Click Ok.
- Once the URL and Name is entered, Click Ok again and head back to the main menu.
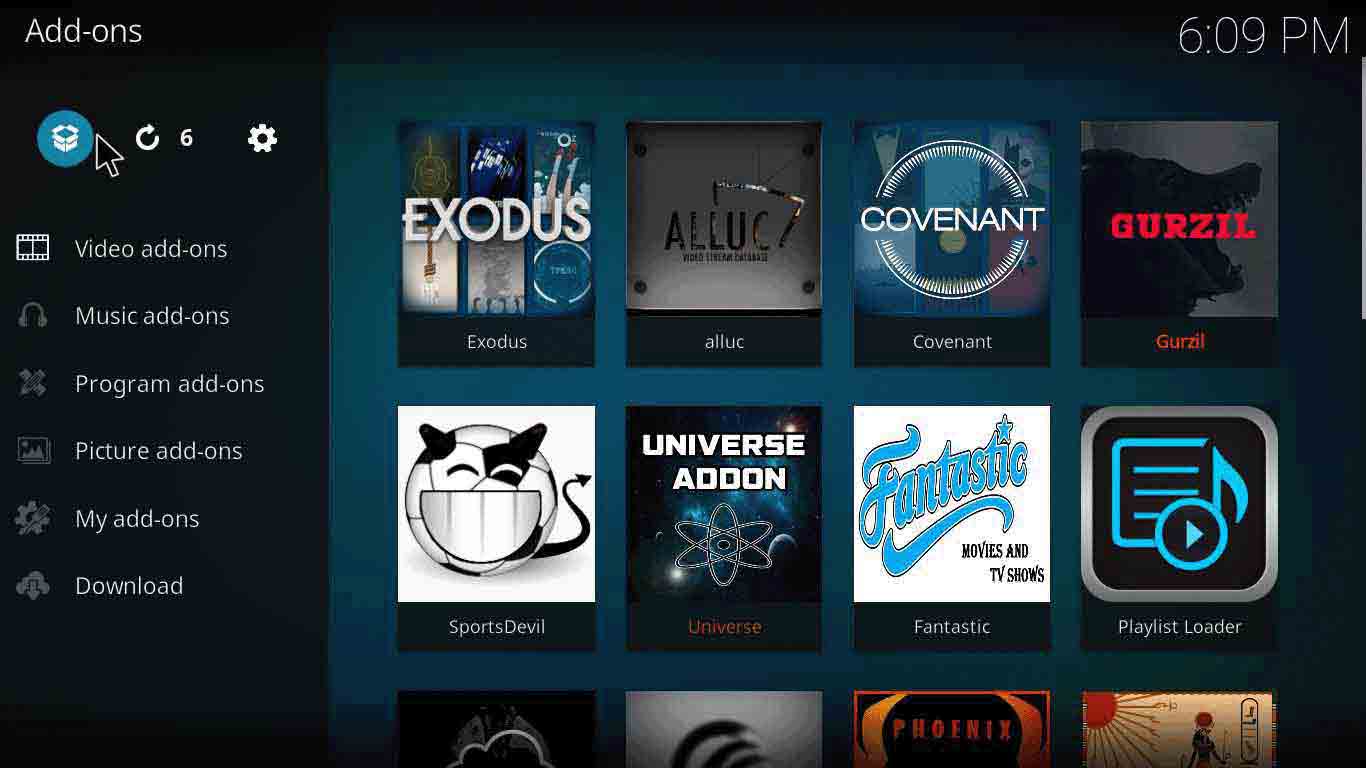
- From the main menu, Click Add–ons > You’ll notice a Box icon (Package installer) on the top left corner, Click on it.
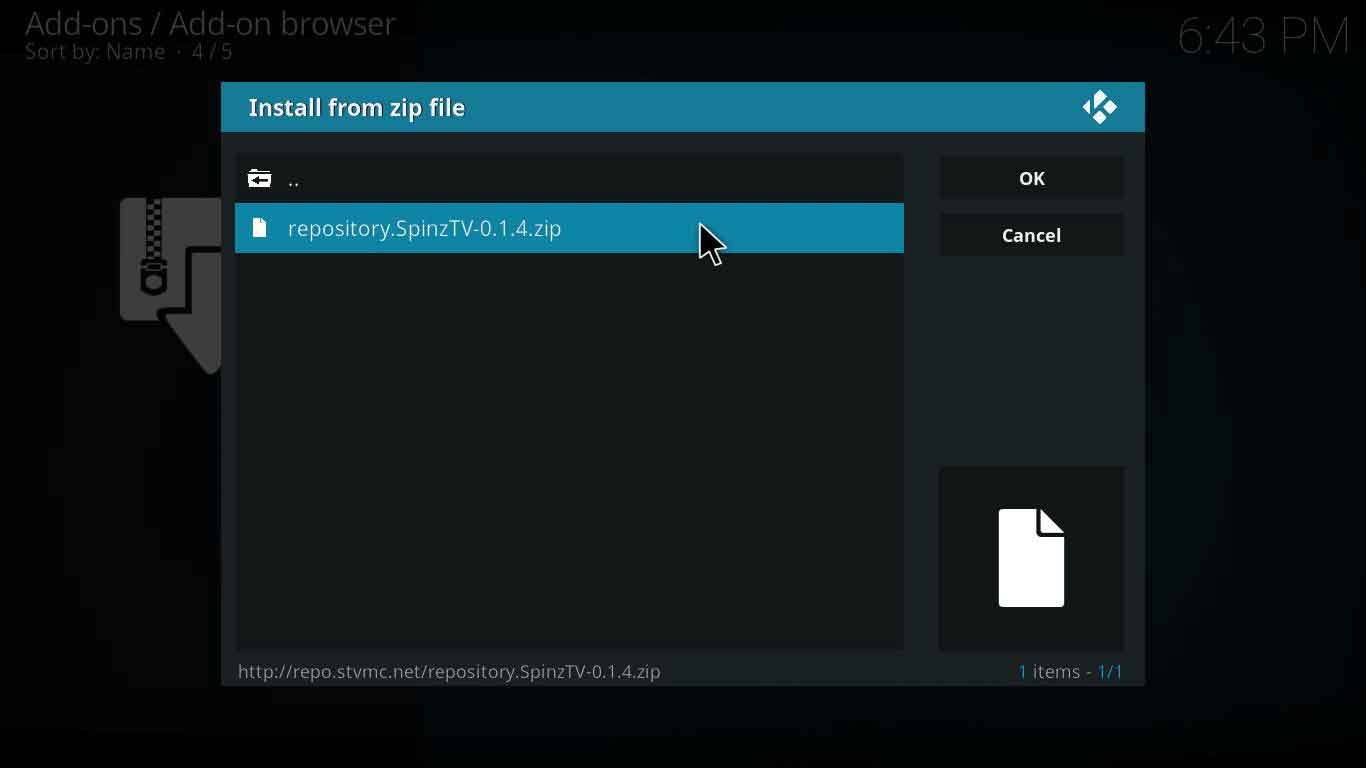
- Now Click on Install from Zip File > Select SpinzFlix from the list > Click repository.SpinzTV-0.1.4.zip and wait for a few seconds until the repository is installed.
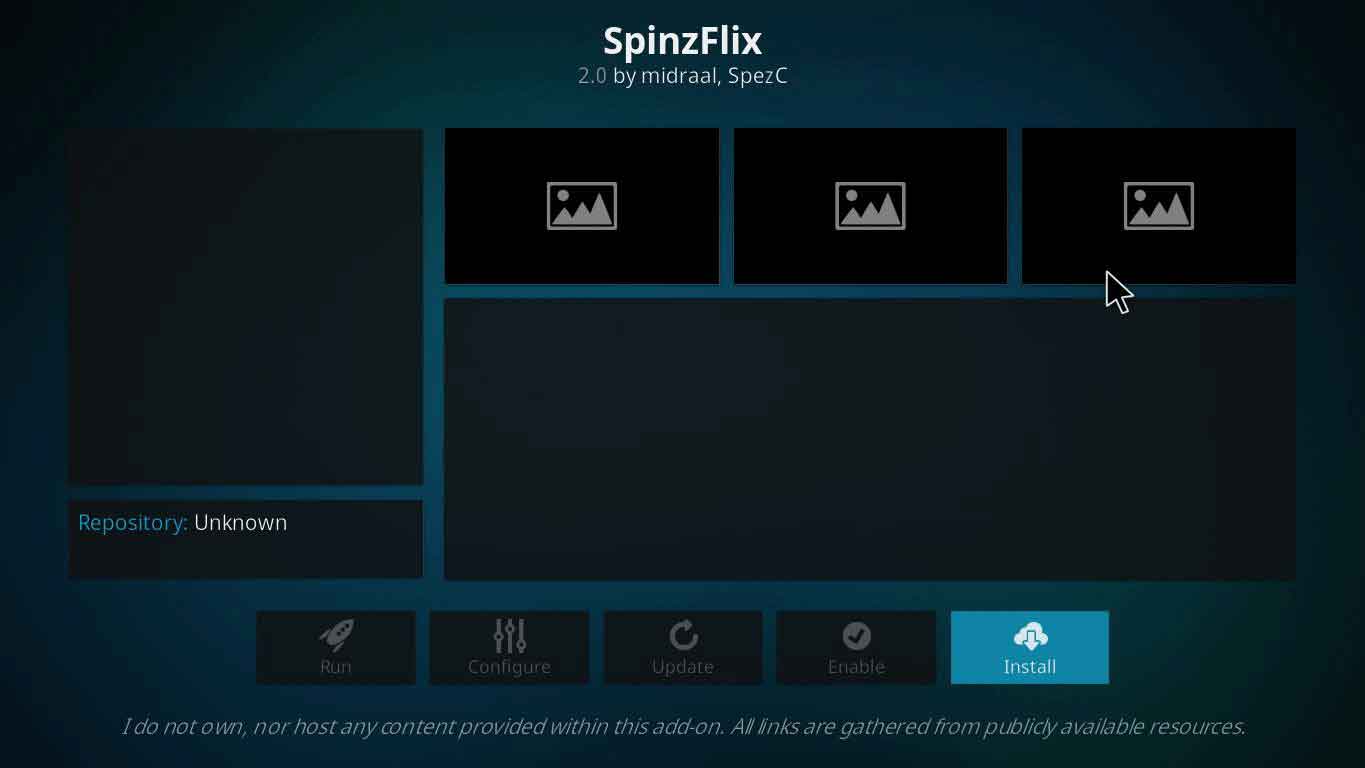
- Once the notification appears, Click on Install from Repository > Click on SpinzTV > Now click on the Install icon and wait for the notification to appear.
- Now that you have installed the add-on, go back to Kodi main menu, Click on Add-ons > Click on Video add–ons > Select SpinzTV and enjoy!
How to install SpinzFlix Kodi on Jarvis Version 16 or below
- Open Kodi Jarvis (v16.1).
- Click the System icon > Go to File Manager.
- Double Click Add source.
- Click on <None> > Enter this URL http://repo.stvmc.net/ > Click Done.
- Name it SpinzFlix> Click Done > Click OK.
- Return to Home screen > Click System.
- Click on Add-ons > Click Install from zip file.
- Click on SpinzFlix > Now click on repository.SpinzTV-x.x.x.zip > Wait for the notification.
- Now click Install from Repository > SpinzTv > Video Add-ons > SpinzFlix > Install > Wait for the notification.
- To access this add-on, go to Videos > Add-Ons > SpinzFlix
Now that you have installed SpinzFlix Kodi, stream your favorite content and enjoy.
How to install SpinzFlix Kodi on Fire Stick
For installing SpinzFlix Kodi addon on Fire Stick, you first need to install Kodi on it. Follow these steps to install Kodi and SpinzFlix Kodi, in a single turn.
- Open Fire Stick Settings > Click on Device > Click Developer Options > Enable Apps from unknown sources. Now you will be able to install third-party applications and plugins on Fire Stick.
- Return to Fire Stick Home Screen > Click Search > Type ‘ES <Space> Explore ‘> Click ES Explore > Click Download > Open.
- Expand Favorites at the left hand side > Click Add.
- A window will pop-up > Type http://bit.ly/getnewkodi in the address bar and Click Next > You can name it ‘New Kodi’ > Click Next and then Click Add.
- Now click on Favorites and then Click ‘New Kodi’.
- Click ‘More’ > Click on ‘Open in Browser’.
- After that, a window will pop-up displaying the message ‘Open with ES Downloader’ > Click on it to start the download.
- Open the file you have downloaded and Click Install > Kodi will be installed.
- Now that Kodi is installed, we’re going to install SpinzFlix Kodi add-on!
- Open Developer Options > Turn ON ADB Debugging and Apps from Unknown Sources.
- Launch Kodi on Fire Stick.
- Click the Settings icon > Open File Manager > Double click Add Source.
- Click ‘None’ and type this URL http://repo.stvmc.net/ > Click OK.
- Name this Media Source ‘SpinzFlix’ and click OK.
- Head back to Kodi Main Menu > Click on Add–ons > Click on the Box Shaped icon to browse addons.
- Click on Install from Zip File > Click on SpinzFlix > Click on repository.SpinzTV-0.1.4.zip. > Wait for the notification to appear.
- Now click on Install from Repository > Click SpinzTV and then Click Install.
- In order to access the add-on, go to Video Add–ons > Open SpinzTV.
SpinzFlix Kodi Not Working/Errors/Fixes
SpinzFlix Kodi Not Working
Users have complained about SpinzFlix Kodi not working and the reason behind it is the problem with its source. Sometimes the developer is updating the repository and it causes an issue for the users as it stops working. Another reason is that the users do not use the proper source for downloading repository.
Fix
It is very easy to fix this error, try re-installing the add-on. If the error still appears, then try using a reliable repository to download the addon.
SpinzKodi No Streams Available
This error appears because of two main reasons, either your internet connection is very slow or weak, or the add-on is unable to pull any streams for you. Might be because of the ISP blocking or any such limitation.
Fix
To fix this error, try using a fast internet connection and a VPN service. If the issue doesn’t resolve, then try reinstalling the add-on.
SpinzFlix Kodi Alternatives
The best thing about Kodi is the number of options that it has. Here are a few alternatives of SpinzFlix Kodi addon:
Final Words
SpinzFlix is a fantastic new addon for movies and TV shows geeks. It has some of the best quality stream links. In addition, its quick speed makes it a strong competitor in its category. This addon has really gained a lot of respect since it came out. This guide presented a detailed steps on how to install SpinzFilx Kodi addon.